Obsidian 이미지 정렬 방법
Obsidian은 Markdown을 이용하기 때문에 별도의 이미지 정렬 방법을 제공하지 않으며, 모든 이미지는 왼쪽에 정렬된다. 따라서 Obsidian에서 이미지를 중앙, 오른쪽으로 정렬시키기 위해서는 별도의 방법이 필요하다.
CSS Snippets을 이용하면Obsidian의 이미지 정렬 방법을 변경할 수 있다.
CSS Snippets
CSS Snippets이란 Obsidian이 제공하는 테마(Appearance) 변경 기능이다.
CSS Snippets을 이용하면 CSS variables를 통해 손쉽게 Obsidian의 테마를 변경할 수 있다.
CSS(Cascading Style Sheets)은 웹 페이지를 꾸미는데 사용되는 스타일 시트 언어이다.
CSS Snippets 이용한 이미지 정렬
CSS Snippets 활성화
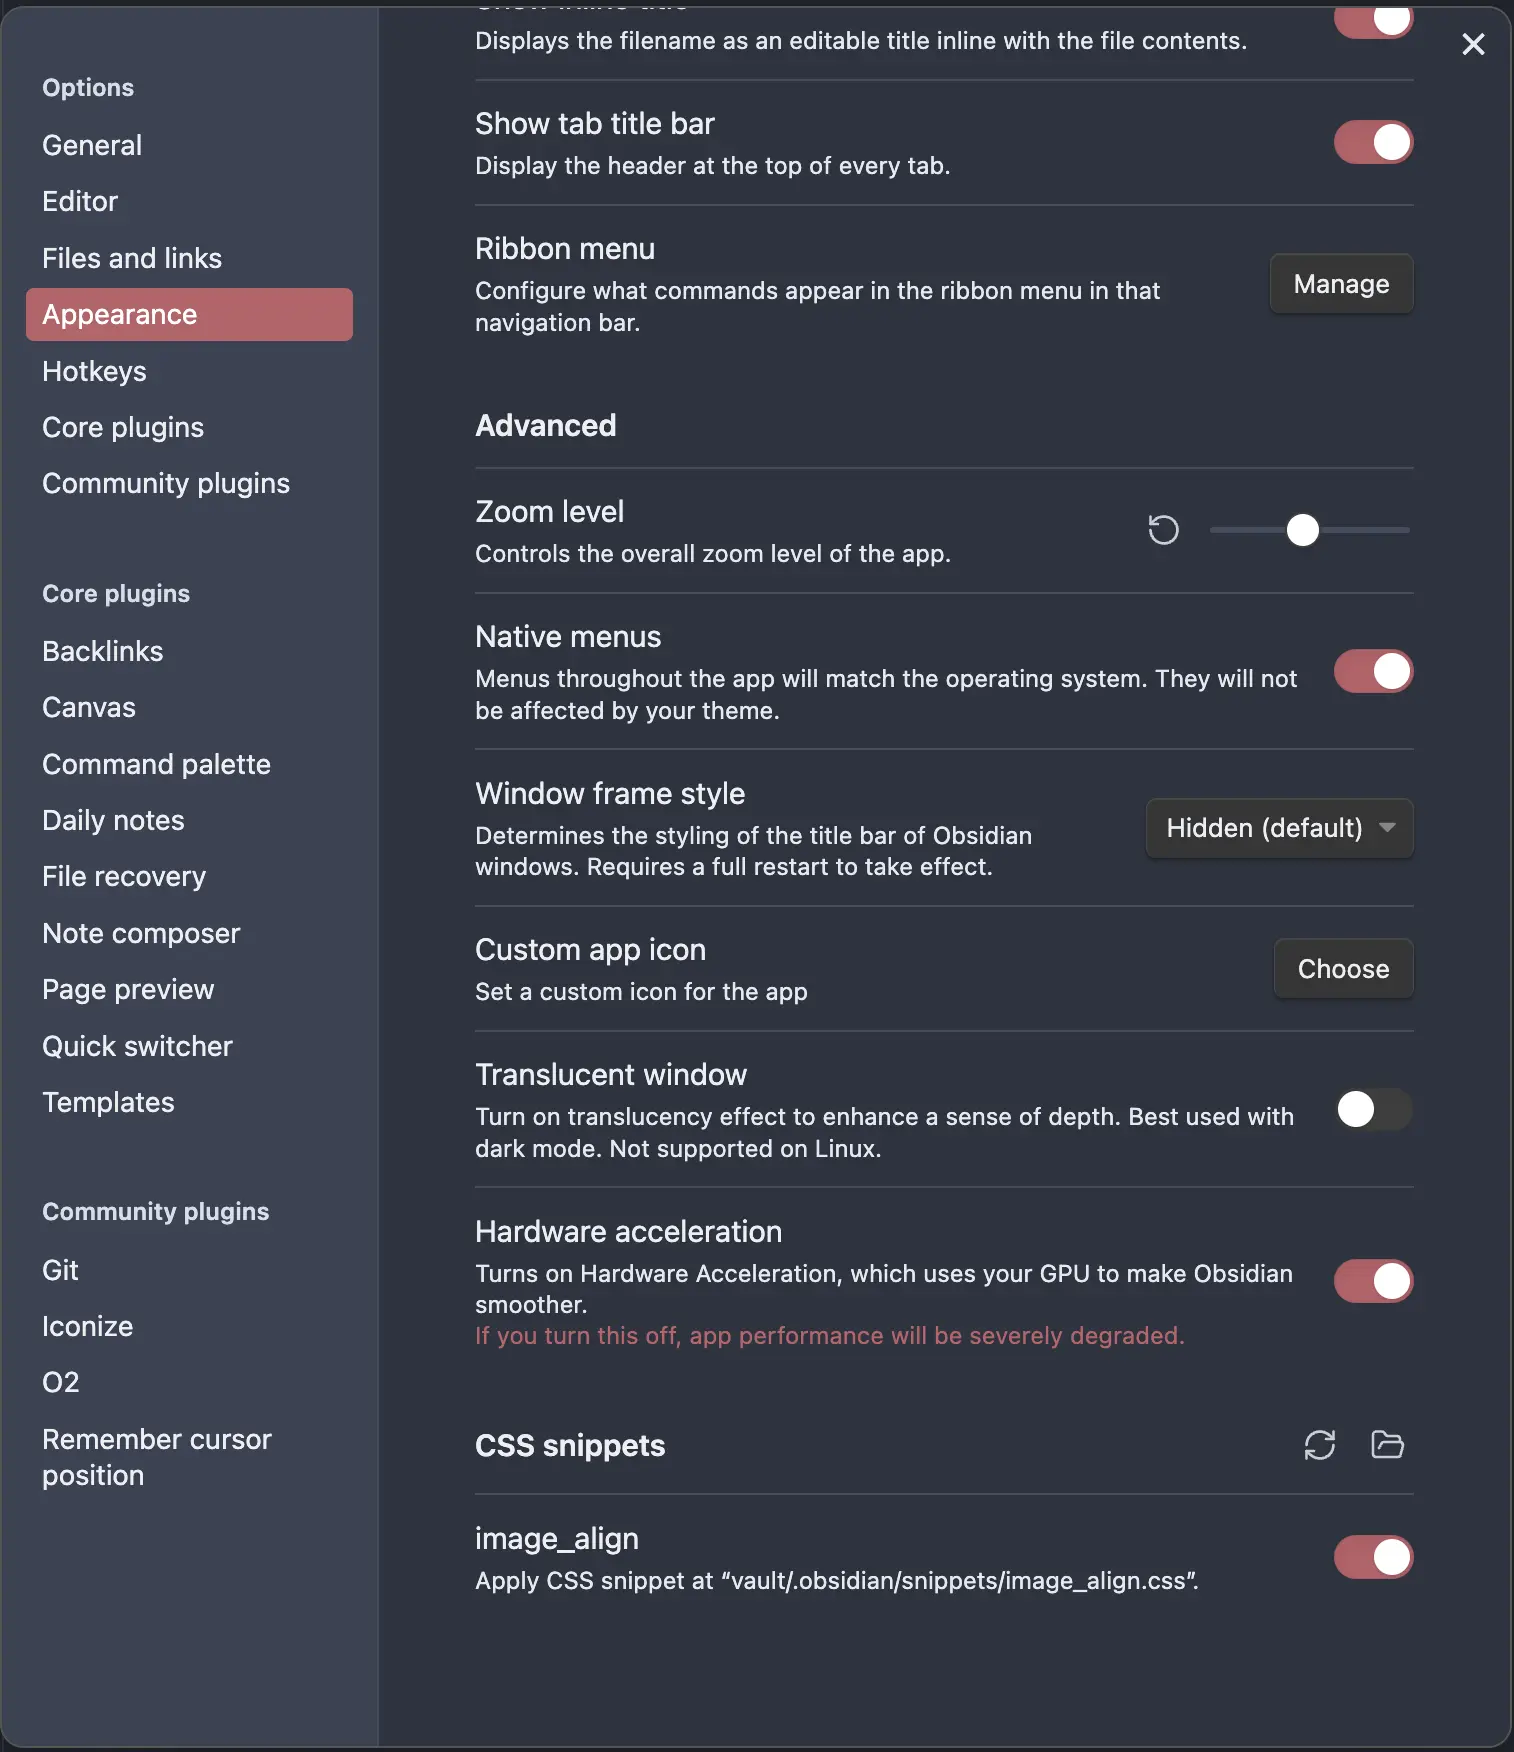
다음의 설정을 통해 Obsidian의 CSS Snippets을 활성화할 수 있다.
설정(Settings) -> 테마(Appearance) -> CSS 스니펫(CSS Snippets)
본인은 이미 만들어 놓은
Snippets이 존재하지만 기본적으로는 아무런 파일도 존재하지 않는다.
CSS Snippets 추가
아래의 방법을 통해 정렬을 지원하는 CSS Snippets을 추가해보자.
Obsidian의CSS Snippets은/[your-vault-name]/.obsidian/snippets에 저장된다.
- 아래의
CSS코드 중 원하는 정렬을 찾아/[your-vault-name]/.obsidian/snippets경로에[your-css-file-name].css파일을 생성한다. CSS Snippets설정에서 리프래쉬 아이콘을 가진스니팻 리로드(Reload Snippets)버튼을 눌러 생성한Snippets을 확인한다.- 생성한
Snippets의 토글 버튼을 통해CSS Snippets을 활성화한다. - 활성화한
CSS Snippets이 잘 동작하는지 확인한다.
모든 이미지 정렬
아래의 CSS Snippets을 이용하면 모든 이미지를 중앙 혹은 오른쪽으로 정렬시킬 수 있다.
CSS Snippets
1
2
3
4
5
6
/* 모든 이미지를 중앙 정렬시킨다 */
img {
  display: block;
  margin-left: auto;
  margin-right: auto;
}
1
2
3
4
5
6
7
8
/* 모든 이미지를 오른쪽 정렬시킨다 */
img {
  float:right;
  clear:right;
  display: block;
  margin-left: auto;
  margin-right: auto;
}
부분 이미지 정렬
아래의 CSS Snippets을 이용하면 다음의 Obsidian 문법을 통해 원하는 이미지를 중앙 혹은 오른쪽으로 정렬시킬 수 있다.
Use Case
1
2
3
1. 
2. 
3. <img alt="center" src="your-image.png">
CSS Snippets
1
2
3
4
5
6
/* 이미지를 중앙 정렬시킨다 */
img[alt*="center"] {
  display: block;
  margin-left: auto;
  margin-right: auto;
}
1
2
3
4
5
6
7
8
/* 이미지를 오른쪽 정렬시킨다 */
img[alt*="right"] {
  float:right;
  clear:right;
  display: block;
  margin-left: auto;
  margin-right: auto;
}

